Monday, September 21, 2015

Scrappy UNQuilting

Scrap Happens

In my line of work, let's face it I generate a lot of scraps. I also totally try live by the philosophy of "waste not; want not". So what happens is bags and boxes full of scraps in my sewing room.

Admittedly I have such an issue (Repeating softly to self: 'I am NOT a fabric hoarder, I am NOT a fabric hoarder...') with this that they often overflow into my bedroom, my children's bedroom, closets, places like that. When they begin to make appearances in more public domain's like my kitchen and my living room I decide it's time to do something with them all.

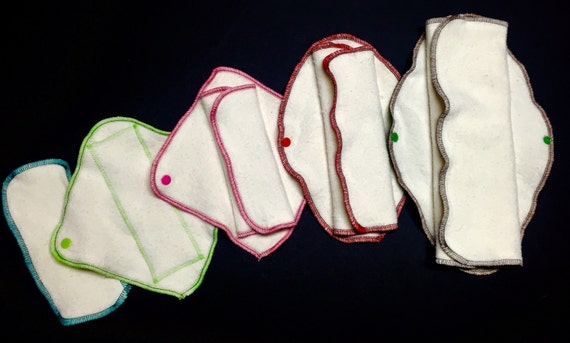
To that end I have striven to come up with ever more smaller, useful products that I am able to then offer to my customers. For example all of my PUL scraps now see new life as waterproof pouches and snack bags. If they are too small to be pouches I try to use them to create decorative wings for my training pants and diapers. My wool scraps get cut up and used to make nursing pad backings and patchwork woolies. Other fabric scraps such as my flannel have become interlabial pads and (NEW) facial rounds, which is about as small as you can get.
My Scrap-Sorting Center
Yet even reusing as much as feasibly possible I still end up with boxes and boxes of small scraps that I simply cannot bear to throw away.
Now look I'm just going to be honest, I do not have the time or patience for old-fashioned quilting. The cutting the little tiny seams, ironing between each piece, pinning, ugh! it's just not for me. While I certainly admire the beauty of these quilts and the women who make them, I simply don't have the patience or time to do them. I have even tried crazy quilting where you don't have to cut the pieces exactly, unfortunately you still have to iron between each sewing and pin when necessary and other things like that.

I like to have a project that I can see the outcome of very quickly it helps me to gain momentum for completing it.To that end I developed a completely new style of quilting. Well OK it's hard to claim that my anything is completely new anymore because as we've all heard there are no new ideas under the sun. However in all of my Internet searches for an easy way to use my scraps I have never encountered this method of quilting.

Basically I simply overlap two scraps of fabric about a half an inch and use a decorative stitch to sew them together. Think of the outcome as something between a crazy quilt and I rag quilt.
The result is that you have the artistic flexibility in your quilt top that you would get with regular quilting while having the ease of production you get with the crazy quilt. 

Two Rows of Scraps joined with seam on reverse
It helps that most of my scraps are in the form of narrow strips or irregular blocks. This means that I can assemble the quilt top in rows. Then I simply fold them over on themselves and cut them so they are actually the same width/height along the whole row. Then I sew the rows together to the length that I desire or the width of my quilt. 
To further simplify things, I prefer to back these in fleece or with two layers of flannel or sometimes even just one layer of flannel for a very lightweight quilt. I find it it's a lot easier to tie off on fleece or to quilt through flannel than to try and have three even layers with batting in the middle. 


Close Up of Quilt Top


The MamaBear Workshop

Heart of the Sewing Room: The Cutting Table

Into the Fray

So I know there are some curious people out there wondering how all this sewing magic happens... (okay so maybe not, but I'm going to share anyway). After we sold our large farm we traded a lot of land and a small house for a larger house on a smaller bit of land. 
Stock shelves and sewing centers
Our new home has 4 bedrooms, one of which is dedicated to my MamaBear Workshop. 

So I've finally come to peace with the mess. I officially "clean house" about twice a year, going through items that didn't make the cut and selling off or donating them, washing the carpets, reorganizing, etc. The rest of the time I maintain a bare minimum of decluttering to allow me to fill orders and complete projects.

Oh sure, I've seen (and drooled over) those "sewing rooms" posted by other hobbyists - they are cute, pretty, and seem to me to never be used. My room is a workhorse that serves one function: to complete and ship out about 3,000 orders a year!

Fabric in Totes
Two Homemade Fabric Racks Dominate the Space
It wasn't long after moving to our new home that I realized my work had outgrown my space, and so I also had a garage built about 50 yards from the house which serves as my primary fabric warehouse. There are shelves on the walls for fabric in totes and small bolts as well as 4 racks for rolls of fabric. Needless to say it doesn't have much room for actual "garagy stuff" in there such as my tools, which stay crammed in a corner until I have to dig them out and make use of them.


In these two admittedly cluttered and stuffed spaces is where all the magic takes place - from designing and testing prototype patterns, picking through fabrics to meet custom requests, cutting, sewing, and stocking all my products, and packaging and shipping them to their new homes.
I thought you all might like to see some of that process (and mess) here. Just be forewarned: it takes a little chaos for great things to happen. :)


Orders all packaged and ready for their new homes.

Monday, September 14, 2015

Getting Over Ewww! Mama Cloth Usage

The "Ick" Factor

One has to wonder where our ideas about what is "gross" came from - I mean for thousands of years there were NO disposable items. We washed and reused EVERYTHING: from dishes to diapers, including menstrual cloths.
It wasn't until about World War II that the concept of disposable menstrual products came into being. These early pads were born of the same cottony gauze concept that brought sterile bandages to the field for soldiers. Early on they were seen as a luxury item, one only the very rich could afford. I mean the idea at the time was "who on EARTH would want to throw something away every time it's used"?!
Now our thinking has gone so far in the other direction that when the salespeople who cut my fabrics are asking what I'm going to do with all that flannel and I tell them they often actually SHY AWAY from the BRAND NEW fabric. Like somehow what they are GOING to be used for soils the new fabric! Seriously!
But I won't preach, truth is that most of us, myself included, have developed a lower "ick" factor tolerance. We are squeamish about things we shouldn't be, and perhaps not about the things we should... okay, I said I wouldn't preach...

So what is Mama Cloth and Why and How do we use it?

Mama Cloth or Cloth Menstrual Pads, are simply fabric designed to absorb menstrual flow, be washed after use, and used again. They can also be used for incontinence of both bladder and bowels to protect undergarments and maintain hygiene.

For most of human history such cloth has been simply cotton or linen that is folded to the appropriate size and fastened or held in place with garments or ties. Once menses is ended the fabric is then washed and dried and saved for reuse. Now cloth options come with all kinds of new choices in terms of materials (cotton, bamboo, linen, wool, fleece, PUL, etc.), colors and prints (who says your period has to be boring?), and modern fasteners such as buttons, snaps, and velcro. They are often shaped to fit inside undergarments and to be more comfortable for the user.

Just like their disposable counterparts, most pads come in an array of absorbencies and sizes. MamaBear size options include: Intralabials, Dailywear Wingless, Dailywear, Small/Medium, Medium/Heavy, and Heavy/Overnight/Post Partum.

The most important factor in reusing cloth products and reducing the "ickiness" is cleanliness. You want to be able to get your cloth items completely clean. Understand that "cleanliness" doesn't necessarily mean without staining. Staining actually alters the color of the fibers, so an item may be stained and still be clean. If staining bothers you or cranks up your "ick-o-meter" you might try purchasing only cloths that are dark in color. Black, red, brown, navy, etc. will likely not show staining. Also high contrast prints have good stain-hiding power.

You also have to remember that the thicker an item is the more difficult it will be to get the center layers both completely clean and completely dry. Dryness is important to both the longevity of your pads and your personal health. We all know what happens when fabric sits damp for prolonged periods - molds, fungi, and bacteria all thrive in moisture. You do NOT want to put that against your privates ladies! That's why many Mama Cloth items are designed to stack or layer for use and come apart for washing. MamaBear LadyWear Cloths unfold completely to be only a few layers thick which makes them wash and dry completely and in a much shorter time. Other options have separate pieces that you use to create the absorbent layers, but then you have to keep track of more parts for your system, although they do allow you to customize absorbency to meet your needs.

Washing and Care of Mama Cloth

The best way to handle cloth menstrual products is to use a Soaking Pot. This is any small container filled with cold water that you place your used pads into until you are ready to wash them. Then simply dump the whole container into the washing machine and wash on normal (cool/cold or warm/cold) wash cycle & dry in the dryer or hang in the sun. You might want to change the water daily during your cycle but this is not necessary. For daily use of pantyliners you could just wash them with your regular laundry (though be sure NOT to use fabric softener).

For Quick-Dry pads like MamaBear's you can wash them every evening or after each use & hang them over a warm vent or lay across a towel to dry in a VERY short time so you can reuse them. If you hand wash only you might want to run your pads through the dryer briefly at the end of each menstrual cycle to re-soften them for next month!

There are some Basic Laundry Rules that should be followed wih Mama Cloth:

NO: heavy perfumes or laundry soap, No fabric softeners! No sheets, no liquid, none added to your detergent. The added fabric softeners & the laundry soap cause the pads to become moisture repellent.
NO: Bleach! Bleach eats fabric & will wear out your pads fast. Instead try adding a little lemon juice to your wash (nature’s bleach) or dry your pads in the sun (nature’s most powerful bleacher). To keep them soft toss them in the dryer for a few minutes before or after line drying.
YES: Believe it or not the best laundry detergents to use on cloth menstrual pads are the cheapest! These typically have no additives, perfumes, or the like. My family uses SUN brand for our cloth pads & diapers.
YES: Strip your menstrual pads occasionally. (Typically once or twice a year is sufficient.) You can strip them by adding OxyClean, Petzyme, Pure White Distilled vinegar, or baking soda to the wash. Each of these has different properties and so rotating through a couple of them seems to work best.

Wednesday, September 9, 2015

BabyWearing in a Ring Sling

To get started you will need to put the ring sling on. You do this by laying the rings over the shoulder of your choice. Tuck tail up through both rings, then bring back down through top ring only (think of this like one of those 1980’s belts with the two D rings).


This should leave you with a tail (mine is short in this picture) with which you can loosen (by lifting up the top ring slightly while pulling on pouch) or tighten (by pulling on tail). You will have a pouch of fabric at the side opposite the shoulder where the rings are. 

Your child will sit up (shown at right) or lay down (cradle carry shown below) in the pouch of fabric either on your front, slid down to your hip, or slid all the way around to your back (carefully and only in sitting position, NOT in cradle carry). For older children their legs may stick out beneath the pouch and the fabric may be pulled up to below their shoulders so their arms can be free to move. For newborns and babies who do not yet have good head control they should either be laying down in a cradle carry (shown at right) or have their legs “frogged” up in the fabric (folded as if they were sitting) and the back of the fabric up over their head for support.