Wednesday, April 1, 2020
Free Surgical Mask Directions
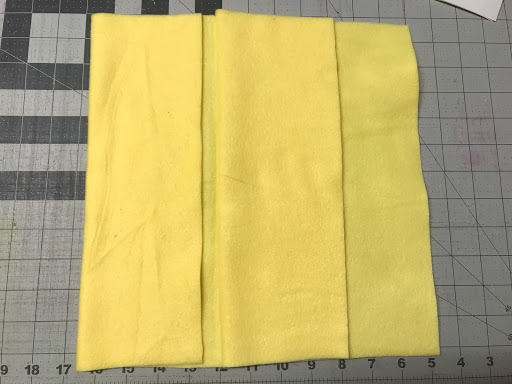
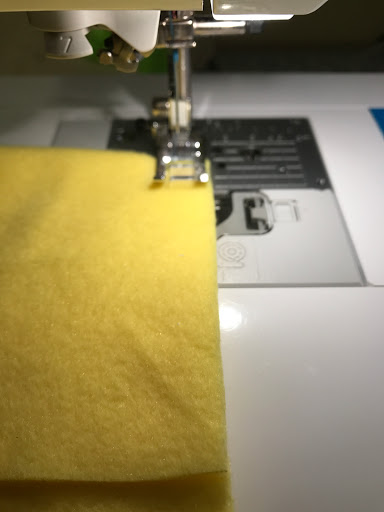
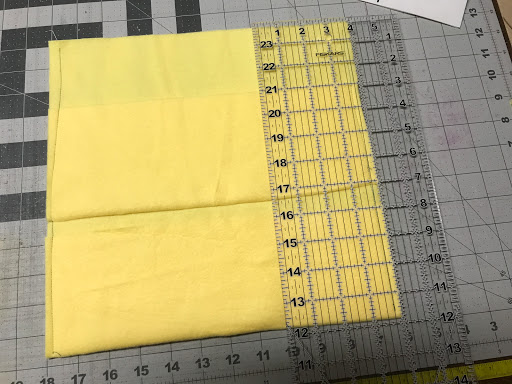
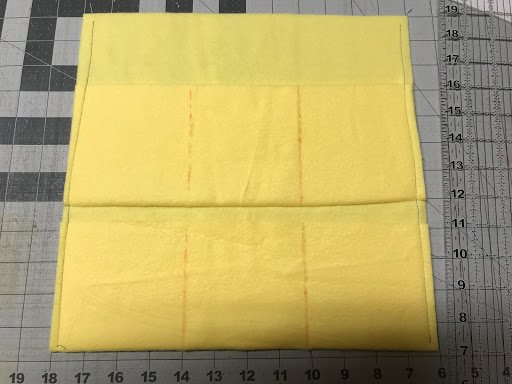
I wanted to take a moment to share a link to the medical mask design that I created for those who sew and wish to make their own for loved ones or to donate.
I know there are many different designs available right now but most of them are quite time-consuming involving complicated pleating and ironing and turning and top stitching. When time is of the essence you may want a mask that is both effective and more efficient to make. I have spent years altering designs to maximize production time and efficiency and have applies those principles here.
This mask meets many of the preferential protection requirements including a non-woven spun or blown fiber filter as well as nose bridge wire for a conformed fit. Although no homemade mask can provide the same level of protection against bacterial and in particular viral penetration as medically constructed N95 masks, this construction conforms to best-practice guidelines offered by the CDC and scientific study to reduce exposure through non-woven material filtration and with maximum breathability.
I hope this helps and is a blessing to someone!
https://drive.google.com/file/d/1MazM8a9GFeBdLRCh22ApRLg9cZ-Z3hYL/view?usp=sharing
Saturday, September 9, 2017
Sew a Simple Egg Apron
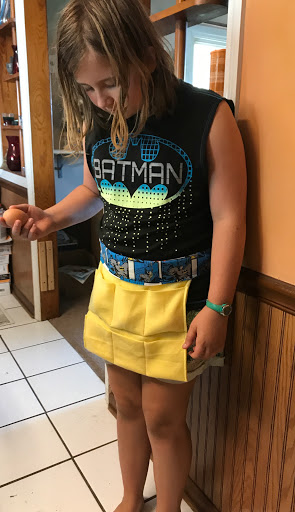
A couple of days ago my son came gleefully into my sewing room where I was working announcing "I have a surprise for you!"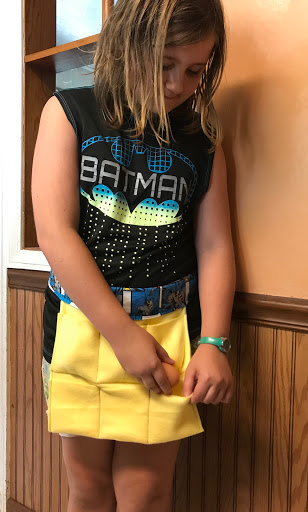
I turned just in time to watch 4 eggs roll out of his gathered tshirt and hit the floor.... his smile collapsed and big tears sprang into his eyes as he realized they had ALL broken. The entire day's harvest. I couldn't even be upset at the mess as he was just so heartbroken to have dropped them.
So this morning I woke up with the thought of making an egg apron for him (and my daughter) when they go to collect eggs from our chickens.
Here is a quick and simple tutorial should you want to make one yourself.
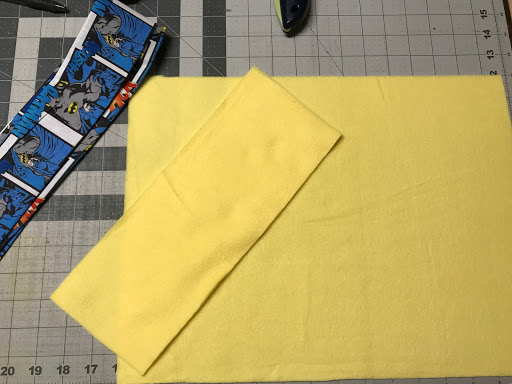
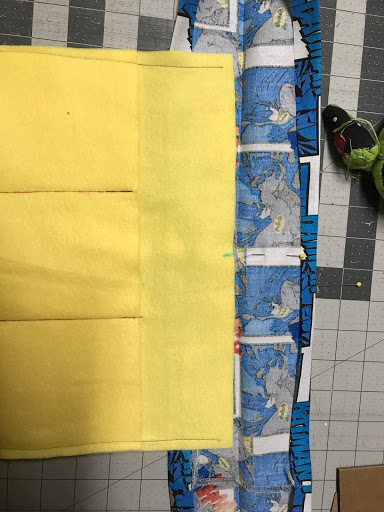
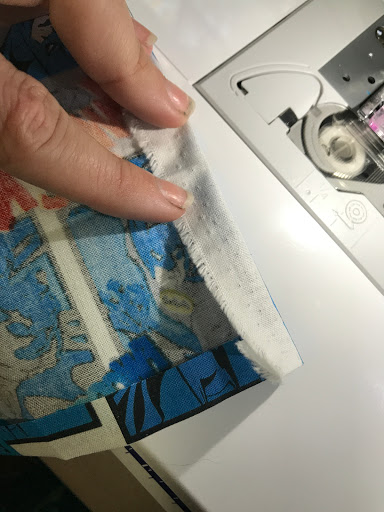
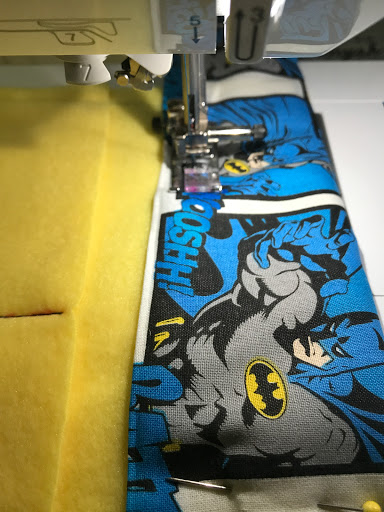
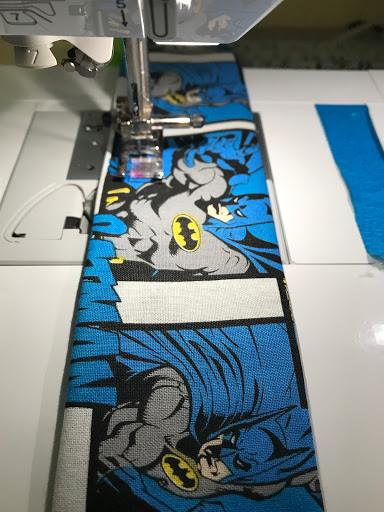
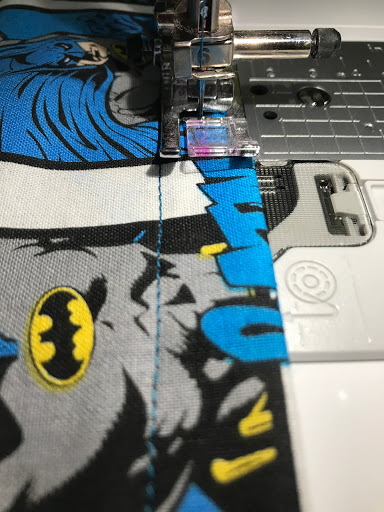
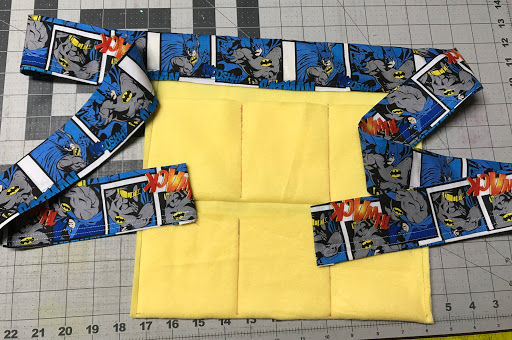
Pick a cute fabric (as you can see from the photo both of my kiddos have been obsessing about Batman). You are going to need a 6" strip by approximately 40-60". (I made mine 60" so I'd have lots of room to tie a bow, though I believe 40" would work on a small child.) in order to get 60" I cut two strips across the length of my fabric and then joined them in the middle with a seam.
Now you have a long 6" strip of fabric - fold it in half wrong sides together and press.
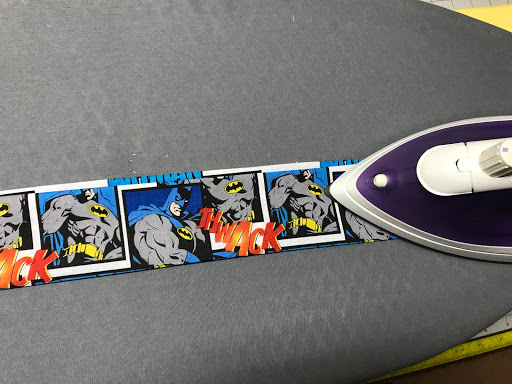
Then fold up each raw edge 1/2 " and press (you are basically making a very wide binding which will also be your apron tie.)

When you are done pressing fold your binding in half lengthwise and pin the center point for future reference.
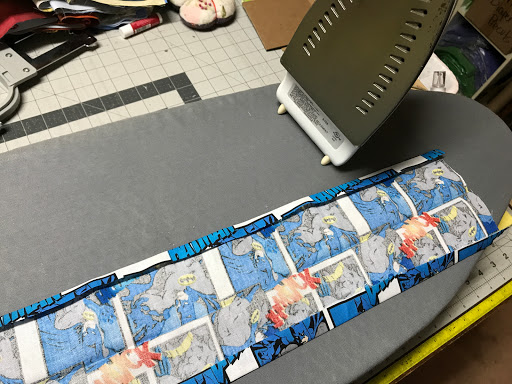
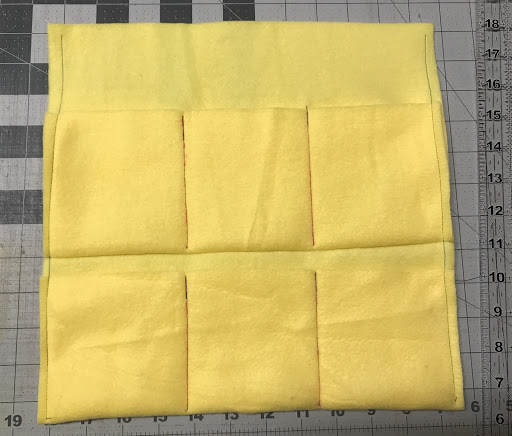
Now we'll cut the apron body. I used fleece because it's soft, stretchy, and doesn't require edge finishing.
You'll cut one rectangle at 12" x 16" and another at 12" x 4.
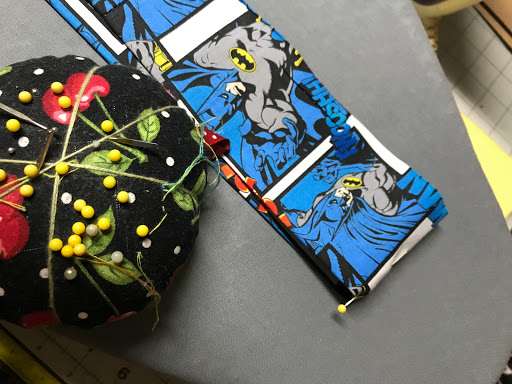
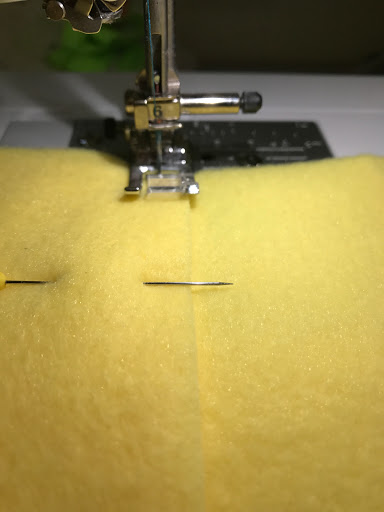
So a 1/4" stitch along the edge at 9.5". 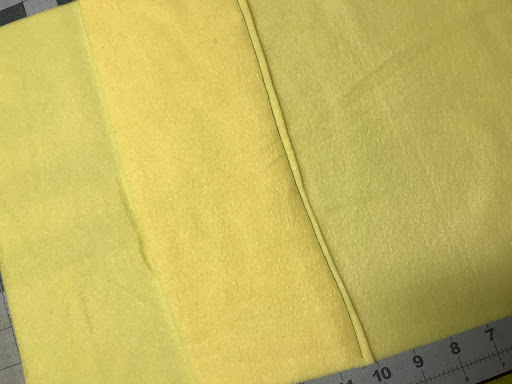
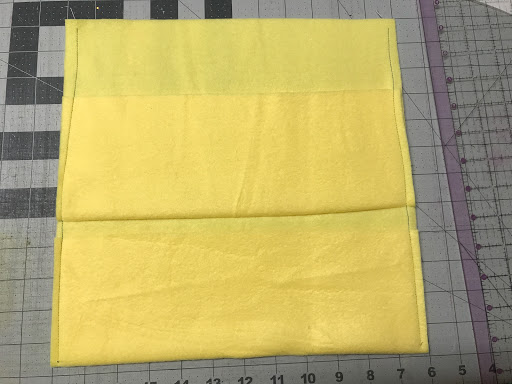
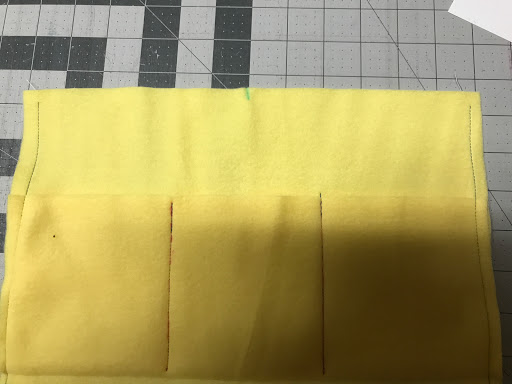
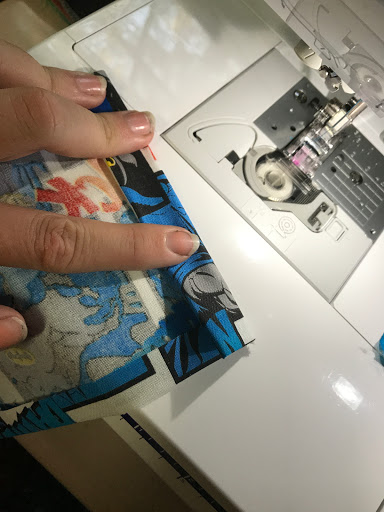
Enclose the top of the apron body in the binding and then pop a few pins along the binding to hold everything together nicely.
At my sewing machine I opened up the ends of my binding and folded them to the inside so that the raw edges would be enclosed in the binding. 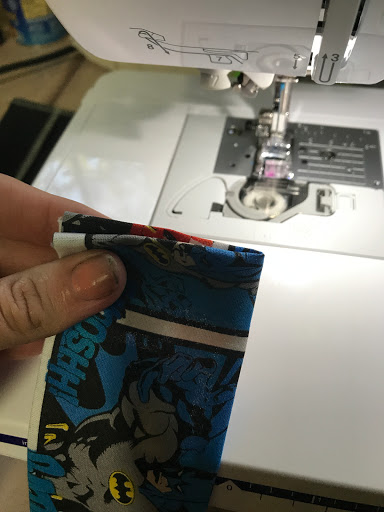
All done! Now go collect some eggs, or rocks, or whatever your heart desires. :)
Thursday, June 9, 2016
What Homeschooling Looks Like For Us
I know that most
homeschool families are happy to get a chance to see how other families
"do school" - it may give us ideas for our own experience, or
maybe it just helps satisfy out innate need to compare ourselves to others; to
reassure ourselves that we are "doing okay". I know of others
who have considered homeschooling but are overwhelmed the responsibility,
options and prospects. While what we do isn't necessarily the
"right" way and won't work for everyone, I thought some out
there might enjoy a look at what homeschooling looks like for us.
In Kentucky, homeschoolers are required
to notify the school board of their intentions to homeschool before the start
of the school year. We are also required to provide at least 1,050 hours of
instruction each year and to maintain records of those hours and grades. (My
older documents say 1,080 hours of instruction, but since we get in nearly
1,200 hours I'm not too worried about it.) They do not tell you how you must do
this, so each family is left to decide what will work best for them. (Did I
mention Kentucky is a GREAT state to homeschool in?!)
We meet these requirements by
schooling 11 months of the year (taking July off), and 6 days a week. Sounds
like drudgery huh? Well this schedule does allow us to school only HALF days
each day so our afternoons are always free for other pursuits (or our mornings
if that suits our needs better)! We also take LOTS of field trips, learning
adventures, and family vacations. This flexibility allows us to do things when
other families cannot saving us money and time for off-season activities.
I have now
schooled my oldest for 6 years and my youngest for the past 2. In that time we
have tried nearly every schooling style and curriculum out there! We've run the
gamut from "unschooling" (not nearly enough structure for us), to
complete curriculum options (way too rigid for us), and even done online
curriculum and full-school options (not nearly tactile enough for us). We spent
the past year doing a lot of notebooking, which opened up the world of books
for my oldest but left my younger, mostly-pre-literate and not-so-crafty son in
the dust. So we had to find ways to accommodate both of their learning styles
while leaving me enough time to work with each of them independently when
needed but also giving them some autonomy to move at their own pace.
On a typical day
I wake up around 7:30 or 8 AM (I stay up all night sewing remember?), they get
up about 1/2 an hour later. They start their "official school day" by
reciting the Pledge of Allegiance and with a prayer, after which I give them
breakfast which they eat while working. We use a graph that allows them to
check off the work as they accomplish it - this allows them to choose what
order they want to do classes in, work ahead in some areas, or skip something
and catch up with it later. I print these schedules off every two months, to
include all planned breaks and Sundays and stick them to their "school
journal" covers. On "long days" we school until around 2 PM,
while short days are over by 12 or 1PM. We don't take any morning breaks
because I've found it distracts them too much and means it takes an hour to get
back on track. Instead they are rewarded for finishing on time or early by
getting to play that much earlier. If we get to 1 PM and are still working they
will take a small break to help me prepare and eat lunch.
 |
| The Daily Checklist |
This checklist
makes it very easy for me to track attendance and grades as well. At the end of
every two months I do an informal check with the book by Robin Sampson:
"What Your Child Needs to Know When"'s handy grade by grade and
subject by subject checklists to be certain we are covering everything we need
to be - that way I can make adjustments throughout the year instead of playing
"catch up" at the end. I also enter all the "x" marks from
the daily charts as time credits into the spreadsheet I keep on my computer.
Each subject/class is "worth" a set time - while some days a class
may actually go over this time and others fall short this is the average time
spent in that subject each day. This allows me to keep track of grades and
hours of instruction.
Here is a list of our subjects and the curriculum we are using in the coming year. My daughter will be entering 4th grade and my son 1st.
 |
| My 4th Grader's "Core Curriculum" |
Bible: Christian Light Unit 4th Grade
Typing: Keyboarding without Tears, 4th Grade
Language Arts: Education.com grammar, journaling
Social Studies: Story of the World
Spelling: Evan Moore Daily Spelling 5th Grade
Mathematics: Christian Light Unit 3rd Grade
Science: Christian Light Units, 5th Grade
Literature: Reading the classics, one/month with reports
Foreign Language: Rosetta Stone Spanish
We also have a time block called "Together Time"
this is a set time filled with art projects, science experiments, cooking
projects, documentaries and discussions, and whatever else our schoolwork for
the day has led us to explore.
 |
| My 1st Grader's "Core Curriculum" |
Bible: Christian Light Unit 1st Grade
Handwriting: Handwriting without Tears
Social Studies: Story of the World
Spelling: Evan-Moore, 1st Grade
Mathematics: Christian Light Units, 1st Grade
Science: Cut & Past Science
Foreign Language: Rosetta Stone Spanish
We substitute some "fun" bonus curricula when the kids get frustrated with something, bored with the same-old workbook, for a fun day, when we are short on time, or when we are a way from home. These are often Dover coloring or subject books, television-based learning like Hooked on Phonics or documentaries, fun worksheets from Education.com. We also enjoy reading the Life of Fred math books together as well as engaging in the many projects suggested in Story of the World.
|
|
 |
| Sample "Bonus" work for 1st Grade |
 |
| Sample "Bonus" work for 4th Grade |
 | |
|
Wednesday, November 11, 2015
Halloween Costumes Through the Years
 | |||
| Celeste's 1st Halloween, 2007 |
Our family has always enjoyed theme-ing (is that a word?) our costumes for Halloween. Sometime around early September (if I'm lucky) or early October (not so lucky) we decide what we want our theme to be for the year. I then begin the hunt for appropriate items from our own stash, local thrift shops, and with friends and start assembling a "costume pile" for everyone.
As the time crunch approaches and there are items that I cannot locate it comes down to having to sew, glue, or otherwise finagle them from materials on hand. I thought it might be fun to share a look at how they have come together over the years.
 |
| Little Red Riding Hood, 2009 |
2009 worked out a bit better with daddy wearing a homemade "wolf suit" (that now does service as an occasional dress up item for "On the night Max wore his wolf suit and made mischief of one kind, and another..." ) and mommy in her "granny" outfit, and a simple, adorable Little Red Riding Hood.
I cannot seem to locate my 2010 photo, our last Halloween together. We were The Wizard of Oz. Daddy had a full Cowardly Lion costume, Celeste was Dorothy of course, Mommy was the Scarecrow, and little Ethan joined us for his first Halloween as To To, complete with black furry costume and was carried around in a picnic basket (since he weighed a hefty 5 lbs at that time), in which he slept the whole time.
 |
| The Wizard of Oz, 2011 (plus a friend's ninja) |
 |
| The Incredibles, 2012 |

The next year we were hung up on Dr. Seuss and wanted to do something from his works but I talked it over with Celeste and she didn't really like "The Cat & The Hat" (which would have seemed like a natural fit). Instead she wanted to use her favorite story about the Sneetches. Now trying to make a "sneetch" was probably one of the more difficult costuming challenges I've faced. Not only is it not a super popular story like some of the other Seuss stories, but Sneetches aren't even human! Only those familiar with Dr. Seuss recognized what we were, but we did win accolades at the Homeschool Character costume contest. :) I used 6 yards of bright yellow fabric and these are the first costumes that we've ever done that were 100% homemade.
 |
| Star-Bellied Sneetches, 2013 |
 |
| Civil War Re-Enactment, October 2013 |
 | |
| Peter Pan with Kent, 2014 |
 |
| Inside Out with Kent, 2015 |
Monday, September 21, 2015
Scrappy UNQuilting

Scrap Happens
In my line of work, let's face it I generate a lot of scraps. I also totally try live by the philosophy of "waste not; want not". So what happens is bags and boxes full of scraps in my sewing room.Admittedly I have such an issue (Repeating softly to self: 'I am NOT a fabric hoarder, I am NOT a fabric hoarder...') with this that they often overflow into my bedroom, my children's bedroom, closets, places like that. When they begin to make appearances in more public domain's like my kitchen and my living room I decide it's time to do something with them all.
To that end I have striven to come up with ever more smaller, useful products that I am able to then offer to my customers. For example all of my PUL scraps now see new life as waterproof pouches and snack bags. If they are too small to be pouches I try to use them to create decorative wings for my training pants and diapers. My wool scraps get cut up and used to make nursing pad backings and patchwork woolies. Other fabric scraps such as my flannel have become interlabial pads and (NEW) facial rounds, which is about as small as you can get.
 |
| My Scrap-Sorting Center |
Now look I'm just going to be honest, I do not have the time or patience for old-fashioned quilting. The cutting the little tiny seams, ironing between each piece, pinning, ugh! it's just not for me. While I certainly admire the beauty of these quilts and the women who make them, I simply don't have the patience or time to do them. I have even tried crazy quilting where you don't have to cut the pieces exactly, unfortunately you still have to iron between each sewing and pin when necessary and other things like that.


I like to have a project that I can see the outcome of very quickly it helps me to gain momentum for completing it.To that end I developed a completely new style of quilting. Well OK it's hard to claim that my anything is completely new anymore because as we've all heard there are no new ideas under the sun. However in all of my Internet searches for an easy way to use my scraps I have never encountered this method of quilting.
 Basically I simply overlap two scraps of fabric about a half an inch and use a decorative stitch to sew them together. Think of the outcome as something between a crazy quilt and I rag quilt.
The result is that you have the artistic flexibility in your quilt top that you would get with regular quilting while having the ease of production you get with the crazy quilt.
It helps that most of my scraps are in the form of narrow strips or irregular blocks. This means that I can assemble the quilt top in rows. Then I simply fold them over on themselves and cut them so they are actually the same width/height along the whole row. Then I sew the rows together to the length that I desire or the width of my quilt.
 |
| Two Rows of Scraps joined with seam on reverse |
To further simplify things, I prefer to back these in fleece or with two layers of flannel or sometimes even just one layer of flannel for a very lightweight quilt. I find it it's a lot easier to tie off on fleece or to quilt through flannel than to try and have three even layers with batting in the middle.
 |
| Close Up of Quilt Top |
The MamaBear Workshop
 | |
| Heart of the Sewing Room: The Cutting Table |
Into the Fray
So I know there are some curious people out there wondering how all this sewing magic happens... (okay so maybe not, but I'm going to share anyway). After we sold our large farm we traded a lot of land and a small house for a larger house on a smaller bit of land. |
| Stock shelves and sewing centers |
So I've finally come to peace with the mess. I officially "clean house" about twice a year, going through items that didn't make the cut and selling off or donating them, washing the carpets, reorganizing, etc. The rest of the time I maintain a bare minimum of decluttering to allow me to fill orders and complete projects.
Oh sure, I've seen (and drooled over) those "sewing rooms" posted by other hobbyists - they are cute, pretty, and seem to me to never be used. My room is a workhorse that serves one function: to complete and ship out about 3,000 orders a year!
 |
| Fabric in Totes |
 |
| Two Homemade Fabric Racks Dominate the Space |
In these two admittedly cluttered and stuffed spaces is where all the magic takes place - from designing and testing prototype patterns, picking through fabrics to meet custom requests, cutting, sewing, and stocking all my products, and packaging and shipping them to their new homes.
I thought you all might like to see some of that process (and mess) here. Just be forewarned: it takes a little chaos for great things to happen. :)
 |
| Orders all packaged and ready for their new homes. |
Subscribe to:
Posts (Atom)